How to clean the coffee pot at home: natural and effective remedies
From simple daily care of the Moka to more
in-depth maintenance: let's find out how to clean a coffee pot at home in a simple but effective way.

- For state-of-the-art coffee, the secret is to regularly and properly maintain the Moka.
- No to soaps and dishwashers: after daily use, one should wash their coffee pot with running water and dry it with a clean cloth.
- A periodic deeper sanitization is recommended for an always shiny and well-functioning Moka.
- To avoid excessive accumulation of limescale in a coffee pot, it is ideal to use filtered or bottled water for both the preparation of coffee and the clean up process.
- How to clean the coffee pot at home in a natural and sustainable way? With three simple ingredients: baking soda, white vinegar and lemon juice.

Key word: maintenance
Eyes half closed, face wrinkled with pillow marks. The sound of coffee coming out of the Moka pot and its scent wafting through the kitchen are a sacred moment for many. For us, it is the perfect way to wake up.
Regular and correct maintenance of the home Moka is essential for a state-of-the-art coffee. Learning how to effectively clean the coffee pot with natural products is very easy. To do so, we have several solutions... all within reach. Let's discover them together.

A clean coffee pot is the secret ingredient for an excellent coffee
Let us immediately debunk the myth that the Moka never needs to be washed. Although it does not need to be cleaned too often, the coffee pot is still subject to accumulating dirt over time. Therefore, every now and then, it needs to be sanitized. By following the right practices and advice on how to clean the coffee maker, your Moka will always be shiny and functional. And the coffee even tastier.
If the coffee maker has been in use for several years, it certainly will not be as spotless as when it was bought. But the gradual wear and tear is part of its charm after all. Yet, maintaining the Moka is an important process to ensure that one can enjoy an excellent coffee and enhance the organoleptic characteristics of the coffee grounds. To preserve the taste of the blend, the oils and grease deposited on the surface of the Moka need to be eliminated, because these are oxidized and burned over repeated usage.
How to clean the coffee pot? Some basic rules
How to clean the coffee pot after using it for a morning coffee? The first rule to keep in mind is to never use soaps or other detergents. In fact, these products are too aggressive and could leave a really unpleasant taste in the coffee pot.
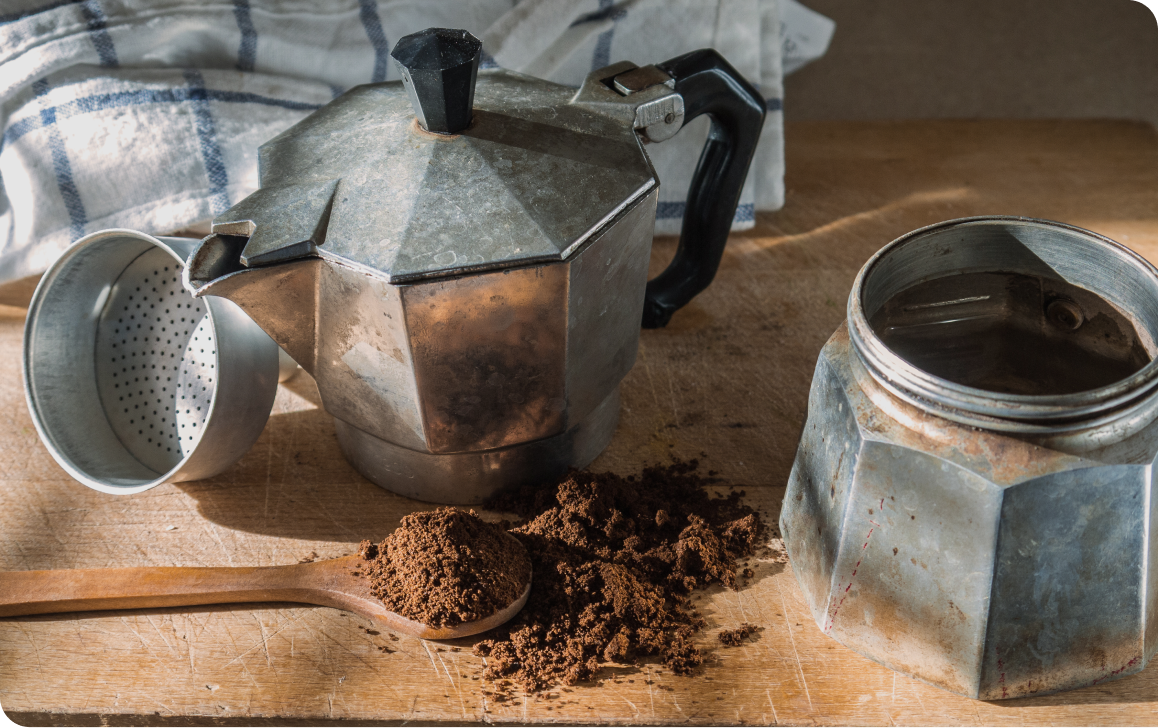
For the Moka, the dishwasher is also off limits: it could, in fact, alter the surface of the material. For daily upkeep, simply rinse the Moka pot under running hot water. Once the coffee maker has cooled down, it must be disassembled by removing the funnel. Set aside the coffee grounds. Finally, thoroughly rinse each component of the coffee maker. Use a clean cloth to dry the clean Moka: it is important not to reassemble it until all the parts are completely dry. This step helps avoid the risk of oxidation.

How to clean the coffee pot more thoroughly
We have seen how to clean the coffee maker on a daily basis to prevent the most stubborn dirt residues from compromising its mechanism. Constant washing of the Moka after each use is essential in this regard. It is recommended to combine this regular activity with a deeper periodic cleaning. This ensures that the coffee maker is always in its full glory and always functions at its best.
- To clean the filter plate of the Moka
It is recommended to periodically check that the filter plate’s holes are free of any obstructions. If they are clogged, they can be cleaned using a toothbrush with delicate bristles or the tip of a needle. - To clean the bottom chamber of the Moka
Fill the boiler with water. Add two teaspoons of citric acid or vinegar. Reassemble the Moka pot and, without adding any coffee powder, brew. Discard the obtained solution. Wash the coffee pot with running water and proceed with the preparation of the coffee.
For effective cleaning of the gasket, simply remove it from the Moka and wipe its entire surface with a cloth soaked in water.
How to remove limescale from the coffee pot using natural products
One of the risks of a superficial clean of the Moka is the accumulation of limescale residues. Limescale is formed with the passage of water. During the heating process, water tends to crystallize the calcium and magnesium contained in it, thereby forming limescale.
How can one remove limescale from the coffee pot? The solution lies in the kitchen cabinet. The products to be used when descaling the Moka are, in fact, natural and 100% green: baking soda, vinegar and citric acid. These substances combine highly detergent and deodorant properties with a certain “delicateness" to them. In short, they do not ruin the Moka as scouring pads or abrasive products do.
To avoid an excessive accumulation of limescale in the coffee pot, it is advised to use filtered or bottled water. In fact, tap water is often very hard, which leads to a more rapid accumulation of limescale. It is therefore preferable to avoid using it during coffee preparation and when cleaning the Moka.
New Moka? Tips for first use
We have now learnt how to clean the coffee pot after each use and how to sanitize it more thoroughly if there are persistent limescale residues. But what is the procedure for a brand new Moka?
When one buys a new coffee maker, there is a small "initiation ceremony" to follow before its usage. To ensure an excellent result and a coffee that meets the highest standards, there are a few simple steps to follow:
- Thoroughly rinse the Moka pot with water and, for the first time, use it only with water without adding any ground coffee;
- Make at least 3 coffees: not to be consumed but necessary to best enhance the aroma of the coffee in the Moka.
It is a small sacrifice, no doubt. However, this operation allows the oils present in the ground coffee to create a thin insulating patina for the metal of the coffee pot, essential for protecting future preparations.

